
This was the year of the tablet/e-reader cases for me and we made costumes for the niece and nephew. Suffice to say this is mostly a photo brag post with links to the other bright folks I used for inspiration. Without further ado:
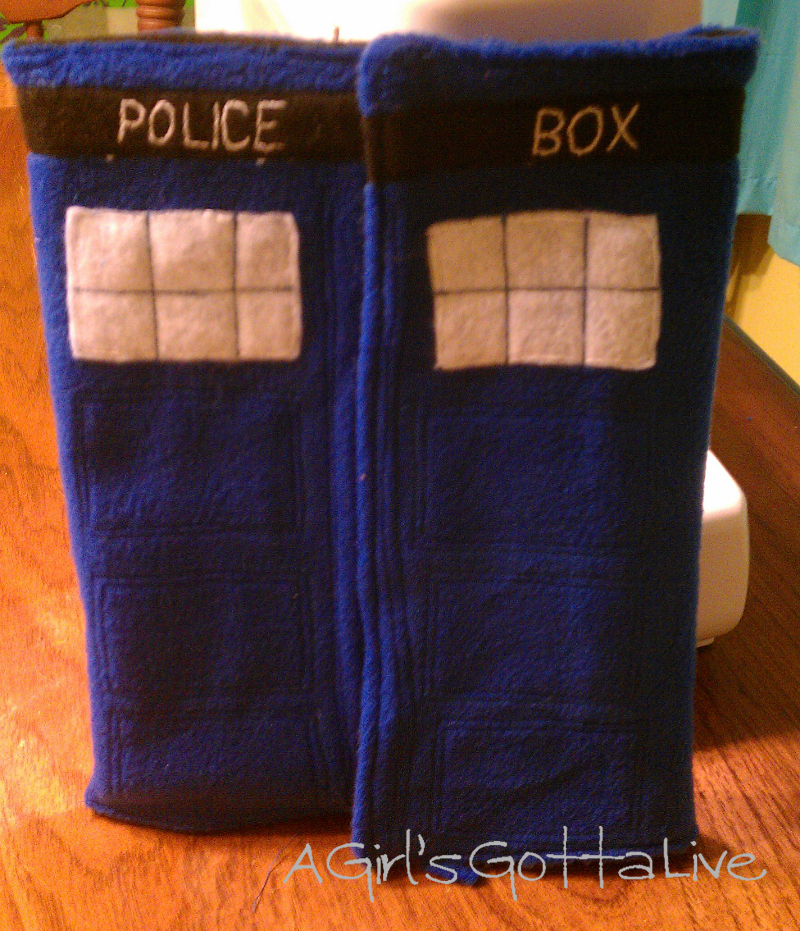
The first gift was a TARDIS iPad case for a gift exchange. The iPad case went to Alaska where it is much loved. This case is envelope style with blue fleece and a black felt lining and felt accent pieces. I hand embroidered the "Police Box" strip and around the white windows. Velcro tape keeps it closed. I didn't have a pattern to use for this one, just the dimensions of an iPad and a bit of math. Honestly, without a walking foot, I don't know that I'd ever do this in fleece again. It was very bulky for my regular machine. I've found some better tutorials (like this one from "Dog Under My Desk") that I would scale up in cotton with interfacing instead. I tested the fit on my friends iPad. The fleece came from Addadi's fabrics in Overland Park, everything else came from my stash.


This kindle fire case belongs to my younger brother's girlfriend. My brother told me that his girlfriend loved her Kindle fire so I made her a case and stuffed it with a gift card. My main tutorial was from Clover and Violet with the corner directions to hold the kindle in coming from I'm Feelin' Crafty. This was a challenge because I slipped plastic canvas in the two sides and not the "spine" portion. As I was binding, my machine would hit the plastic canvas and curse at me by skipping stitches. I also never got a clear picture of how to do the closure around the binding so I created a button hole in the binding and threaded my closure loop through the button hole. The green inner fabric came from Fabric Recycles, the rest came from my stash.

Max got a new Christmas collar, mostly because I had the pieces and was procrastinating doing other things. The lining is a soft gold color to complement the gold threads in the collar. Fabric and collar "D" ring came from Fabric Recycles, buckle and parachute buckle came from Hancock Fabrics.

My brothers got my mom a kindle for Christmas this year so I made her a cover. I used the same process and methods as I did for my brother's girlfriend but I used a bit of fabric from my stash and, after playing on a scrap for a long time, had my first adventure in free motion quilting. I broke two needles before getting a larger one and read lots of blog posts on the subject. This was a thicker fabric and had a layer of batting between the two cover fabrics so it was sturdy enough to not need stiffeners. Free motion quilting was an interesting experience but I'm glad I tried it. Mom really liked the cover so that's all that matters! Fabric and notions were from my stash.


For our niece, Sweetheart and I decided she would like an apron and chef's hat. I created this apron with an oilcloth body and seersucker bias binding, both of which I got at (guess where?) Fabric Recycles. The seersucker was a pain in the rear to work with but so worth it for the overall look. The dimensions for the apron came from SupaFine and I just deducted the seam allowances since I didn't line the apron. I used the bias tape to finish all the raw edges. I also added elastic to the neck strap thanks to a great idea at Sew Liberated. Sweetheart made the chef's hat, which you can see here.
Sweetheart made a tool belt and cape for our nephew too! You can find her sewing adventures on her blog. That's it! After several late nights and plenty of time with a seam ripper, I'm not sewing any more this year! Good thing it's almost next year, right?


